Edit Mode
Editing in Painter
Basics
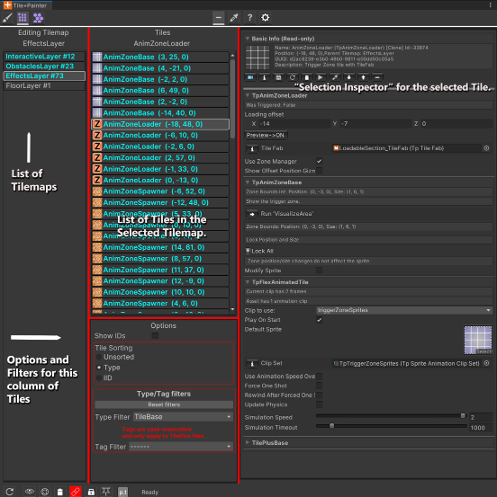
The left column still displays a list of Tilemaps. When you select a Tilemap in the left column then the center column will display the tiles in that map along with thumbnail images of tile sprites and their positions, followed optionally by the tile’s Instance Id. If the tile is a TilePlus tile, then the color of the label is bolded and changed to the cyan color (or blue if not in Dark mode).
When you select a tile in the center column, the right column shows an appropriate selection inspector, and the tile in the scene will be highlighted for a time determined by the “Highlight Time” setting. The highlighting does not occur if any Action button is selected and that action type affects the scene (anything aside from Off, Help, or Setup).
Use Ctrl+click on a tile to open its script in your IDE.
Use Alt+click on a TilePlus tile to open the instance in a new window.
- This is experimental.
- Only applies to TilePlus tiles.
Multiple-select two or more TilePlus tiles of the same Type and you can edit the tiles' fields in a special multiple-selection inspector.
- This is NOT the same as a Unity Inspector's multi-object editing.
- Internally, the first TilePlus tile in the selection is cloned.
- You're editing this 'mock' tile.
- After you make any changes, an Apply button appears.
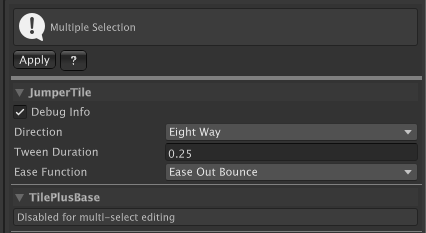
- When Apply is clicked, ALL of the mock tiles' fields are copied to the selected TilePlus tiles.
- Only public fields which are decorated with the
[TptShowField],[TptShowEnum], and[TpTShowObjectField]attribute are affected. - The tile's GUID isn't affected nor are any other private fields or tiles without the attribute.
- The mock tile is discarded.
- Only public fields which are decorated with the
The only fields that can be edited are those which are 'decorated' with certain attributes as mentioned above. The TilePlusBase section and Customized IMGUI inspectors added to specific TPT tile classes with the TptShowCustomGUI are not shown because they can cause exceptions in this isolated editing environment.
Note: any fields decorated with TptShowObjectField attribues which have been set up to allow Scene objects OR have been set up to handle 'sub-objects' (don't worry about it) won't be shown.
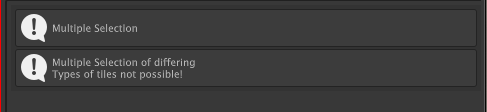
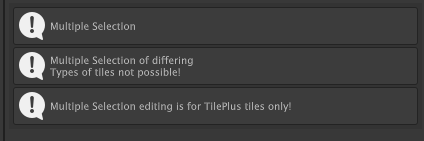
ALL tiles in the multiple-selection must be of the same Type and they all have to be TilePlus tiles.
Different Types:
Mixing of TilePlus and Normal Unity tiles:
Tilemap List Options
The bottom part of the center column has display, sorting, and filtering options.
Show IDs: if checked, tile Instance IDs are shown next to their position. For TilePlus tiles this is the ID of the clone instance in the scene. For all others, this is the ID of the Asset in a Project folder.
Sorting: Choose None, by Type, X or Y, or by Instance ID.
Filtering
- Filter by Type: Choose TileBase for ALL tiles. Choose Tiles for all tiles derived from Tile (most normal Unity tiles and all TilePlus tiles; but NOT Rule Tiles, AnimatedTiles or other Tiles deriving directly from TileBase rather than Tile).
- TPT tile types are added to this list automatically. Those deriving directly from TileBase require a simple plug-in. Plugins are already provided for Rule tiles and AnimatedTiles.
- Filtering by Tag: this is only used for TPT tiles (since others don’t have tags).
The filters are not persistent and automatically reset when appropriate. The filters are ANDed, that is, both the Type filter and the Tag filter are used. Internally, the Tag filter runs first (only for TPT tiles).
When the number of tiles in the list is greater than the Settings value: Max # Tiles to display then the list is truncated, the labels change color, and filtering isn’t used.
Selection Inspector Variants
For TPT tiles you’ll see Selection Inspector shown in various images in these docs.
Tile tiles (normal Unity Tiles) are assets so you can only open an Inspector on the asset.
Listing all the positions for a Tile might make the list thousands of items long, which would be useless. However, you can edit a particular Tile position on a Tilemap: use the Pick tool in Edit mode.
The Selection Inspector will look like this:
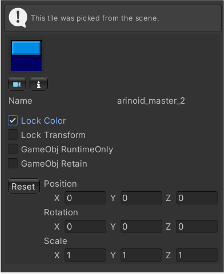
This inspector has the following features:
- See a preview of the Tile’s Sprite.
- Focus on the selected Tile.
- Inspect the selected Tile.
- This action opens a Unity Inspector on the Tile ASSET.
- This is the Tile asset in the Project, so be careful!
- Change the Lock Color or Lock Transform flags.
- Change the two GameObject-related flags.
- Change the Color if Lock Color is unchecked.
- Change the Transform if Lock Transform is unchecked.
If you change the flags, Color, or Transform: The Asset is not affected since these changes only affect the Tilemap at the Tile’s position.
To reiterate: changes in this inspector do not affect the original Tile asset in your Project folder. The only time that that could happen is if you open the asset in a Unity Inspector as mentioned above.
The two GameObject flags are not visible if the Tile doesn’t have a GameObject.
TileBase tiles (i.e., Rule tiles, AnimatedTiles, and the like) just show the tile sprite (from the plugin) and allow you to open an inspector on the TileBase tile asset (again, this is in the Project). If you want to edit the values at the Tilemap position, use the Pick tool at that position. However, results may not be what you expect when using Rule tiles.