Scene List Editor
Now that you have a TSceneList asset, let's edit it.
Examine the asset in an inspector and click the button to open the customized editor window and you’ll see something that looks like this:
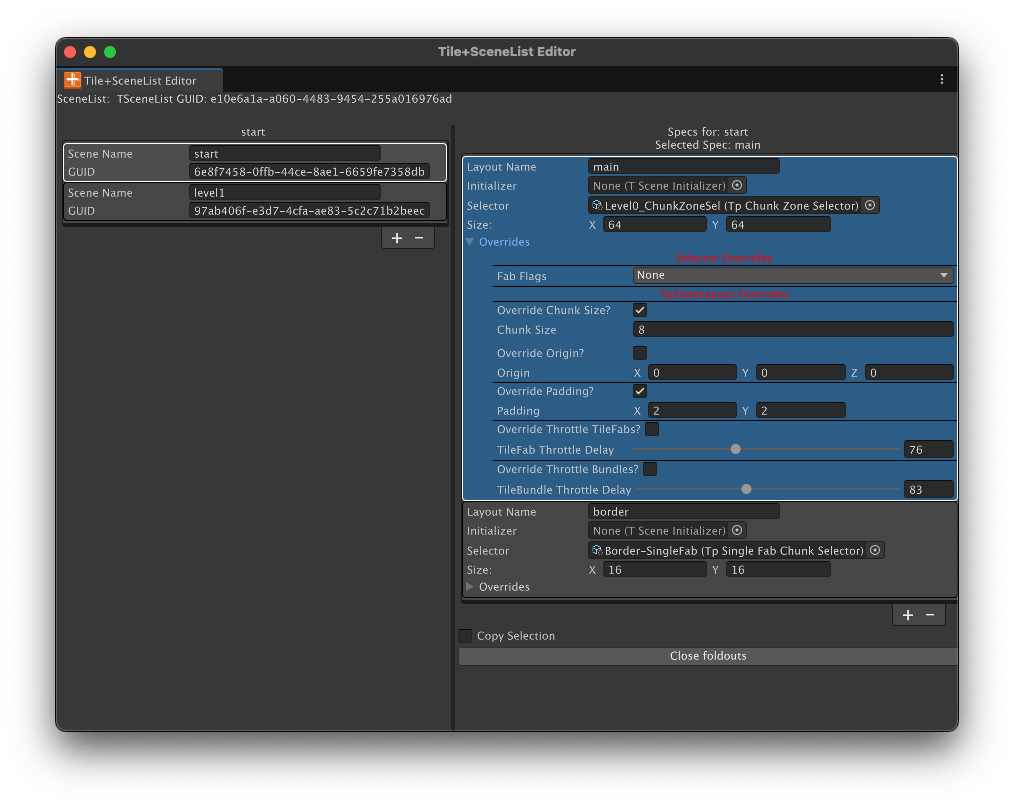
The left column lists all the TScenes in the asset; there are only two shown but more can be added with the + button. The Scene Name, the index of the TScene in the list, or the GUID can be used to load the scene using TpChunkedSceneManager.
The right column lists all the TSceneSpecs for the TScene shown in the left column. You can add more TSceneSpecs but often one is all you need. The reason for more than one will be discussed a bit later.
The TSceneSpec contains the name of the TpZoneLayout component to be used with this Spec, making the connection to the layout engine’s setup for this TSceneSpec. Again, more on this later.
The TSceneSpec also has a reference to a Selector; drag its reference into the field. When this field is populated, the non-editable SIZE field shows the total size of the area that the Selector represents: the size of the largest bounds of all the TileFabs referenced in the Selector.
Each Spec contains overrides for the Selector and for the ZoneLayout being used by the Spec.
Fab Flags allows overriding the LoadingFlags chosen in the Selector. Note that None won’t set the flags to None but rather indicates “no overrides.” To actually set the LoadingFlags to None use “Override None”.
The remaining overrides allow changing fields of the TpZoneLayout named in the LayoutName field. For example, to change the Chunk Size that’s in the ZoneLayout component just check the Override Chunk Size checkbox and whatever value is in the Chunk Size field below the checkbox will be poked into the ZoneLayout when the TScene is loaded.
Changing the Chunk Size is the most common override.
Please note that if either 'throttle' checkbox is on, padding is automatically increased by (1,1) to avoid visual artifacts.